Installation and connecting Workable
Step-by-step setup: install the plugin, activate your license, connect your Workable account subdomain, and add an API token for on-site applications.
Workable Jobs for WordPress needs WordPress 6.0 or newer and PHP 7.4 or newer. It connects one Workable account to one WordPress site.
1. Install the plugin
- Download the plugin ZIP from your account on portal.w4dev.com.
- In wp-admin, go to Plugins → Add New Plugin → Upload Plugin, choose the ZIP and click Install Now.
- Click Activate.
A Workable Jobs menu appears in wp-admin, with Settings, Imported jobs, Submissions and License underneath.
2. Enter your license key
Go to Workable Jobs → License and paste the key from your purchase email. The key turns on plugin updates from inside wp-admin. The plugin lists your jobs whether or not a key is entered.
3. Connect your Workable account
Go to Workable Jobs → Settings and fill in Account subdomain.
Your subdomain is the name Workable gives your account. You can find it in either of these places:
- Your Workable login address,
https://acme.workable.com. The subdomain isacme. - Your public careers page,
https://apply.workable.com/acme/. The subdomain isacme.
You can also paste either full address into the field. The plugin keeps only the subdomain.
Click Save Changes. The first import starts within about a minute. When it finishes, your
jobs are listed at https://yoursite.com/jobs/, and each job has its own page underneath.
To check the connection without waiting, use Tools → Test connection at the bottom of the Settings screen. It fetches your Workable job list and reports how many jobs came back. Import jobs now runs a full import straight away.
If the test or the import reports “Workable could not find that account or job (HTTP 404)”, check the subdomain’s spelling against your careers page address. A failed import leaves the jobs already on your site in place.
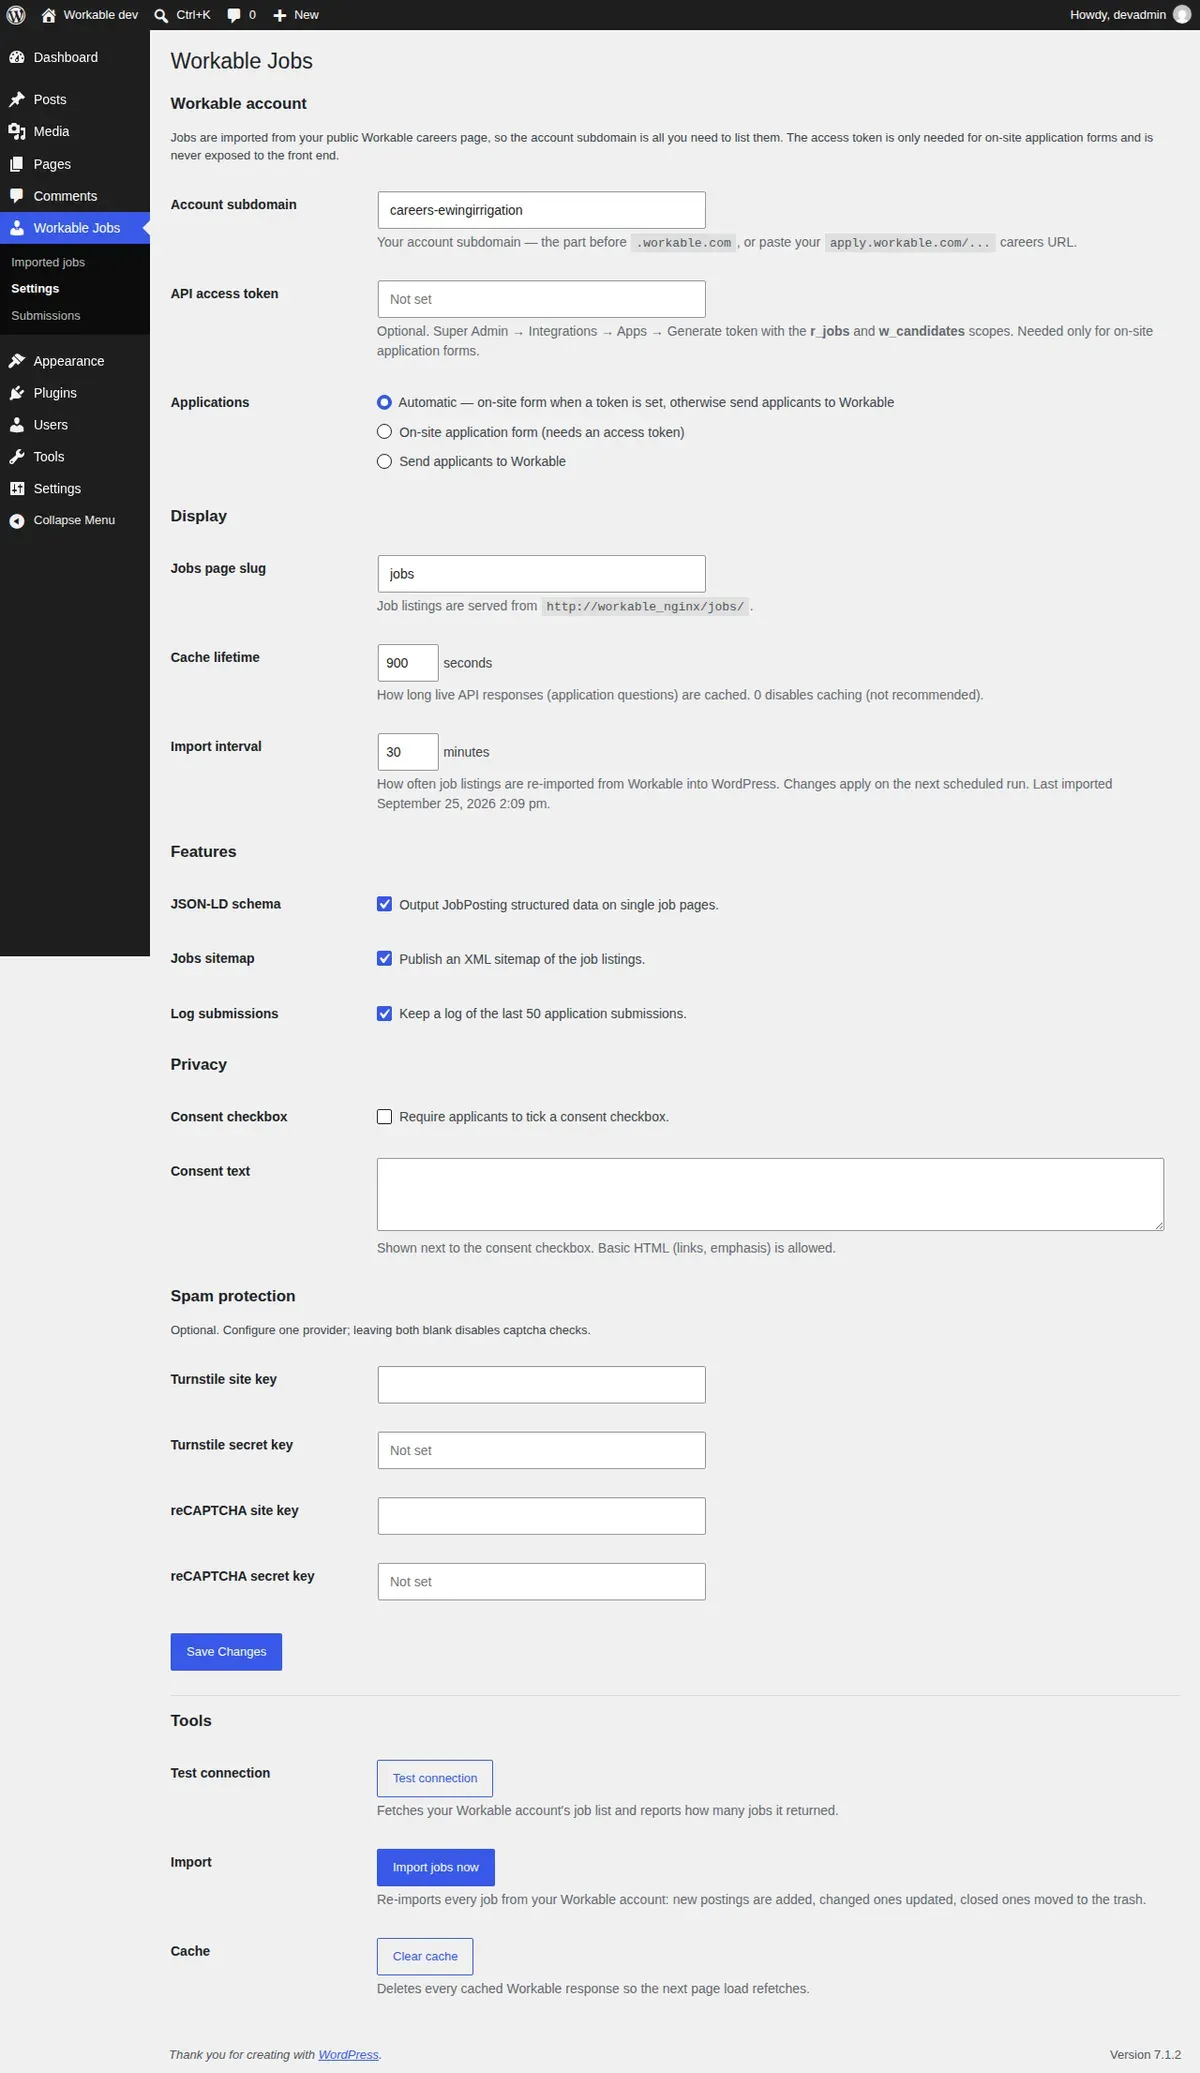
4. Optional: add an API token for on-site applications
Without a token, the apply button on each job page sends candidates to Workable’s hosted application form. Everything else works the same. Add a token when you want candidates to apply on your own site instead.
Generate the token in Workable
You need to be a Super Admin in Workable.
- In Workable, go to Super Admin → Integrations → Apps.
- Choose Generate token.
- Give the token a name you will recognise later, such as “WordPress site”.
- Tick the two scopes the plugin needs:
r_jobs, to read each job’s application form and questions.w_candidates, to create candidates when someone applies.
- Generate the token and copy it somewhere safe.
API tokens are available on every Workable plan.
Save the token in WordPress
Paste the token into API access token on Workable Jobs → Settings and save.
- The token is stored as a WordPress option on your own server.
- Once a token is saved, the settings screen shows a row of dots instead of the token. The token is not printed into any page or sent to visitors’ browsers.
- To replace it, paste a new token and save. To remove it, tick Remove next to the field and save.
How the plugin uses the token
The token is used for two things only: fetching a job’s application form when a visitor opens that job, and sending an application to Workable. Job lists and job pages do not use it.
Workable allows each account token 10 requests every 10 seconds. The plugin caches each job’s application form for an hour, so a busy job page costs about one request an hour. If Workable is briefly over its limit when someone applies, the applicant sees “Workable is busy right now. Please try again in a moment.” and the attempt is recorded in Submissions.
If the token stops working
If Workable rejects the token, the plugin switches that job back to the Apply on Workable
button, so candidates can still apply. An admin notice explains the problem and names the fix:
generate a new token with the r_jobs and w_candidates scopes and save it under Workable
Jobs → Settings. After a rejection the plugin waits five minutes before asking Workable again.